Table of Contents
Claude Code Architecture
Most developers install Claude Code, run a few sessions, and assume the tool works by magic. It does not. Claude Code is a layered configuration system — and every layer has a file. Understand those files and you can control exactly what Claude knows, what it is allowed to do, and how much it costs you per session. Ignore them, and you are leaving performance, security, and token efficiency on the table.
This guide maps the complete file architecture of Claude Code, from installation artifacts to multi-machine sync. It is written for developers and business operators who want precise control over how their AI coding environment behaves — not for beginners who want reassurance that Claude Code is “easy to set up.”
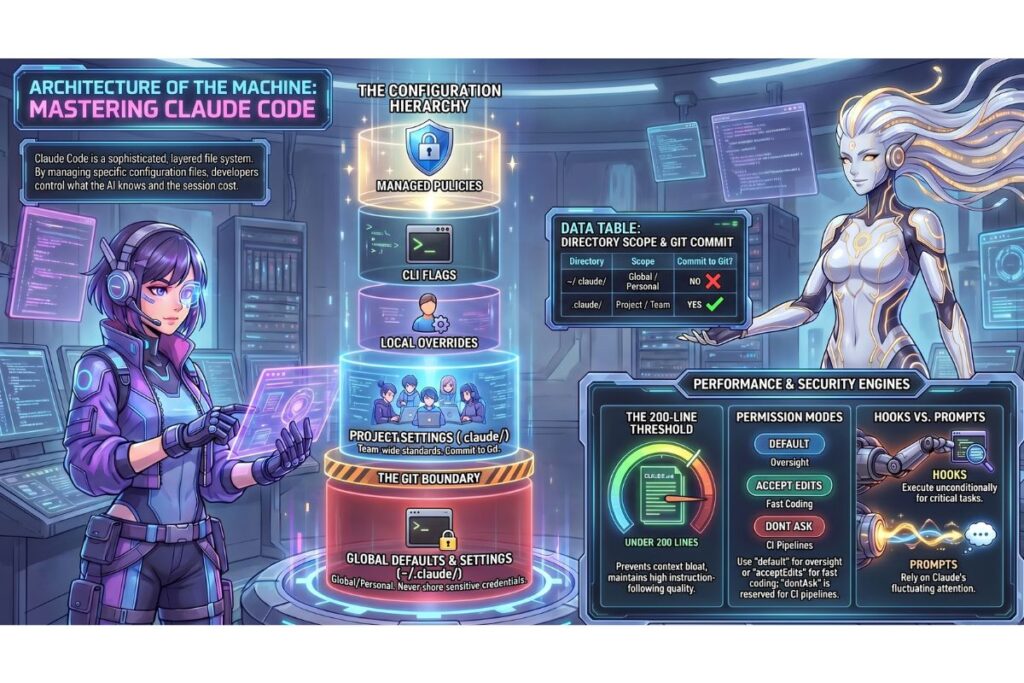
Table of Contents
- What Gets Installed: The npm Package Anatomy
- The Two .claude Directories: Global vs Project
- The CLAUDE.md Memory System: How Claude Learns Your Context
- settings.json: The Permission Engine
- MCP Server Configuration: Extending Claude’s Reach
- Hooks: Automation That Cannot Be Ignored
- Subagents and Slash Commands
- The ~/.claude.json State File
- Token Efficiency: File-Level Optimisation
- Multi-Machine Setup via iCloud
- The Bottom Line
What Gets Installed: The npm Package Anatomy
Running npm install -g @anthropic-ai/claude-code does two distinct things: it downloads the package from the npm registry, and it generates local state files on first run.
Package Contents (Downloaded from npm)
The installed package lives inside your npm global directory, typically ~/.npm-global/lib/node_modules/@anthropic-ai/claude-code/ on a Mac with a custom global prefix, or /usr/local/lib/node_modules/@anthropic-ai/claude-code/ on default installations. The key contents are:
- cli.js — the main entry point; this is what runs when you type
claudein the terminal. Read-only. Does not sync across machines. - package.json — declares version, dependencies, and the
claudebinary mapping. Read-only. - node_modules/ — all runtime dependencies (React for the TUI, Ink for terminal rendering, the Anthropic SDK, and others). Read-only. Downloaded fresh on each machine; do not attempt to sync.
- dist/ or src/ — compiled JavaScript source. Read-only.
The npm install also creates a global symlink so that the claude command resolves from any directory:
/usr/local/bin/claude(or~/.npm-global/bin/claude) — symlink to the cli.js entry point. Read-only, machine-local.
Files Generated Locally Post-Install
These are not downloaded. Claude Code creates them on first run or first authentication:
- ~/.claude.json — the primary state file. Stores OAuth session tokens, per-project tool approval history, and user-scoped MCP server configurations. Editable, but editing manually is risky. Never commits to git. Never syncs across machines — each machine holds its own authentication session.
- ~/.claude/ — the global configuration directory, created on first run. Contains your personal CLAUDE.md, settings.json, and agents. Editable. Selectively syncable (see Section 10).
- ~/.claude/CLAUDE.md — your global instruction file, loaded into every Claude Code session regardless of project. Editable. Can be synced via iCloud or symlinked.
- ~/.claude/settings.json — global permissions and preferences. Editable. Can be synced.
- ~/.claude/memory/ — auto-memory notes written by Claude itself between sessions (v2.1.59+). Machine-local. Do not sync.
For further reading on how these integrate with your broader AI toolchain, AI Coach covers practical configuration strategies for business operators running multi-model workflows.
The Two .claude Directories: Global vs Project
There are two .claude directories in any Claude Code setup. Most users know about one of them.
~/.claude/ — Global, User-Level
This directory lives in your home folder and applies to every project you open. It is the personal layer of your Claude configuration. Files inside it load before any project-specific rules.
| File | Controls | Commit to Git? |
|---|---|---|
| CLAUDE.md | Personal instructions across all projects | No |
| settings.json | Global permissions and preferences | No |
| agents/ | Personal subagents available in all projects | No |
| memory/ | Auto-memory notes (machine-local) | No |
| worktrees/ | Temporary git worktree isolation (auto-managed) | No |
.claude/ — Project-Level
This directory lives inside your project root and controls Claude’s behaviour for that specific codebase. It is the team layer. Files here are intended to be committed to git so that every developer on the project gets the same Claude behaviour.
| File | Controls | Commit to Git? |
|---|---|---|
| CLAUDE.md | Project-specific instructions | Yes |
| settings.json | Project-wide permissions (shared with team) | Yes |
| settings.local.json | Machine-specific overrides (personal) | No — auto-gitignored |
| agents/ | Project-specific subagents | Yes |
| rules/ | Path-scoped instruction files | Yes |
The priority hierarchy, from highest to lowest: managed policy → CLI flags → settings.local.json → .claude/settings.json → ~/.claude/settings.json.
When two settings conflict, the higher-priority source wins. This means your team can set project defaults while individual developers override them locally without affecting anyone else — a clean separation between shared standards and personal preferences. Tools like Twinlabs apply similar layered configuration logic to their AI-assisted learning environments, where learner preferences sit above institutional defaults without overriding them.
The CLAUDE.md Memory System: How Claude Learns Your Context
Claude Code has no persistent memory between sessions by default. Every conversation starts with a blank context window. CLAUDE.md files solve this by loading instructions directly into the system prompt at session start — before you type a single character.
The Four Load Locations
Instructions load in this order, from lowest to highest priority:
- Enterprise —
/Library/Application Support/ClaudeCode/managed-settings.jsonon Mac. Set by IT administrators. Cannot be excluded or overridden by any user or project setting. - User —
~/.claude/CLAUDE.md. Your personal preferences across all projects. Loaded second. - Project —
./CLAUDE.mdin the project root. Team-wide project context. Loaded third. - Local —
./CLAUDE.local.mdin the project root. Personal project overrides that are gitignored. Loaded last and takes highest project-level priority.
Levels do not replace each other — they stack. All rules apply simultaneously, with more specific levels overriding on conflicts.
What Belongs in CLAUDE.md vs What Belongs in Prompts
The single most common mistake with CLAUDE.md is treating it as a dumping ground for every instruction you have ever given Claude. This destroys performance.
Put in CLAUDE.md: facts Claude needs in every session — build commands, project structure, naming conventions, “always do X” rules, and architecture decisions that never change.
Put in prompts: one-off instructions, context that changes per task, experimental rules you are testing, and anything you would not want a new team member to read on their first day.
The 200-line threshold matters. Files over 200 lines consume more context and measurably reduce instruction-following quality. This is not a soft guideline — it is a documented performance characteristic. As instruction count increases, Claude’s adherence decreases uniformly across all instructions, not just the later ones. An oversized CLAUDE.md does not just add cost; it degrades the behaviour you rely on most.
Path-Scoped Rules
For large codebases, put specialised instructions in .claude/rules/ as separate markdown files. These load only when Claude works with files matching the defined path pattern. An API module can have its own validation standards. A frontend directory can have its own component conventions. Neither set of rules loads into sessions where it is irrelevant — which reduces token cost and keeps CLAUDE.md lean.
Auto-Memory (v2.1.59+)
Auto-memory lets Claude write notes to itself between sessions without any action from you. It saves build commands it had to look up, debugging insights, architecture notes, and workflow habits. Notes are stored in ~/.claude/memory/ as plain markdown you can read, edit, or delete at any time by running /memory inside a session.
Auto-memory is machine-local. It does not sync across machines and cannot be shared with teammates. This is intentional — auto-memory records what you have taught Claude in your sessions, not what the project requires from everyone.
The claudeMdExcludes setting lets you prevent specific CLAUDE.md files from loading. This is useful when you are working in a directory that has an irrelevant or conflicting instruction file from another project. Enterprise-managed CLAUDE.md files are exempt from exclusion — they load regardless of this setting.
For practical guides on structuring AI instruction files for business workflows, 1 Hour Guide publishes step-by-step frameworks that apply directly to Claude Code configuration.
settings.json: The Permission Engine
Every Claude Code permission decision — whether Claude can run a bash command, read a file, or call an external service — passes through the settings.json permission system. Understanding this file is what separates a locked-down, predictable Claude setup from one that prompts you for approval 40 times a session.
The Five Configuration Scopes
In priority order (highest first):
- Managed —
/Library/Application Support/ClaudeCode/managed-settings.jsonon Mac. Enterprise-enforced. Cannot be overridden. - CLI flags —
--allowedTools,--disallowedToolspassed at invocation. Temporary, session-only. - Local —
.claude/settings.local.json. Machine-specific. Gitignored. Wins over project settings. - Project —
.claude/settings.json. Shared with the team. Committed to git. - User —
~/.claude/settings.json. Personal defaults across all projects. Lowest priority.
The Four Permission Modes
The defaultMode setting controls what happens when a tool call does not match any explicit allow or deny rule:
- default — prompts for approval on first use of each tool. Best for exploratory or unfamiliar projects where you want oversight.
- acceptEdits — automatically accepts file reads and writes, still prompts for shell commands. Best for focused development sessions where file changes are expected.
- dontAsk — accepts all operations without prompting. For CI pipelines and fully automated workflows only.
- bypassPermissions — skips the entire permission system. Dangerous. Only appropriate in fully isolated sandbox environments.
Allow/Deny/Ask Rule Syntax
Rules use the format Tool or Tool(specifier). Evaluation order is: deny first, then ask, then allow, then defaultMode fallback. Deny rules always win, regardless of array position.
{
  "permissions": {
    "allow": ["Bash(npm run *)", "Bash(git commit *)"],
    "deny": ["Bash(rm *)", "Read(./.env)", "Read(./.env.*)"],
    "ask": ["Bash(git push *)"]
  }
}
The * wildcard matches any continuation. Bash(npm:*) matches npm install, npm run, and npm test. The specificity of pattern matching means you can allow entire tool categories with one rule while carving out exceptions with deny entries.
For MCP tools, the rule format uses double underscores: mcp__servername__toolname. Note that MCP rules do not support parenthesised patterns — mcp__github(pattern) is invalid syntax.
additionalDirectories
By default, Claude Code can only read and write within the current working directory. The additionalDirectories setting extends this to additional paths:
{
  "permissions": {
    "additionalDirectories": ["/Users/yourname/shared-libs", "~/obsidian-vault"]
  }
}
This is essential for monorepo setups, shared configuration directories, or — in the case of an Obsidian vault workflow — giving Claude access to documentation and reference material that lives outside the project root.
MCP Server Configuration: Extending Claude’s Reach
MCP (Model Context Protocol) servers are Claude Code’s plugin system. They extend Claude’s built-in tools with connections to external services — databases, GitHub, Slack, Sentry, and thousands of others.
The .mcp.json File
Project-scoped MCP servers are configured in .mcp.json, which lives in the project root (not inside .claude/). This is a deliberate separation — MCP integrations are committed with the project, not buried in the configuration directory.
User-scoped MCP servers — those you want available across all projects — are stored inside ~/.claude.json under the MCP configuration section. They are managed via the claude mcp add command or by editing the file directly.
The claude mcp add Command
claude mcp add server-name --url https://mcp.example.com/sse
This writes the server configuration to either ~/.claude.json (user scope, default) or .mcp.json (project scope, with --scope project). When a teammate clones your project and opens Claude Code, they are prompted to approve the servers defined in .mcp.json once — after that, they work automatically.
Tool Search (v2.1.7+)
When you have many MCP servers configured, the combined tool list can consume significant context. Tool Search addresses this by dynamically loading MCP tools on-demand rather than preloading all of them into every session. It activates when MCP tools exceed 10% of your context window.
If you have a small, fixed set of MCP servers, disabling Tool Search reduces latency and ensures every tool is immediately available without a lookup step. If you have dozens of servers configured, Tool Search is worth keeping enabled.
Security Implication of Pre-Approved MCP Permissions
Some MCP frameworks — particularly those that configure themselves automatically — write allow rules for their own tools into .claude/settings.local.json during setup. This means Claude can call those tools without prompting you for confirmation. Review this file after any automated MCP setup. If you see mcp__servername entries in the allow array that you did not add manually, audit them before they become a permanent fixture of your workflow.
For business operators integrating external MCP servers, AI Coach provides practical guidance on evaluating which integrations are worth the permission exposure.
Hooks: Automation That Cannot Be Ignored
Hooks are shell commands or LLM prompts that fire automatically at specific points in Claude’s operation. The critical distinction between hooks and CLAUDE.md instructions: hooks execute unconditionally. A CLAUDE.md instruction says “please do this.” A hook makes it happen regardless of what Claude decides.
The Four Hook Types
- PreToolUse — fires before Claude calls a tool. Use this to block dangerous commands, modify tool inputs, or log what Claude is about to do.
- PostToolUse — fires after a tool call completes. Use this for automatic formatting after file writes, linting after code generation, or test runs after edits.
- Stop — fires when Claude finishes responding. Use this for session-end summaries, cost reporting, or cleanup tasks.
- Notification — fires when Claude generates a desktop notification (used in headless or automated modes).
Hook Configuration
Hooks are defined in settings.json under the hooks key:
{
  "hooks": {
    "PostToolUse": [
      {
        "matcher": "Write(src/**/*.js)",
        "command": "npx prettier --write $CLAUDE_TOOL_OUTPUT_FILE"
      }
    ]
  }
}
The hook receives tool call data via stdin as JSON, and can respond with approval, denial, or a modified version of the tool input via stdout. Exit codes carry meaning: 0 is success, 1 signals an error to Claude (which will retry or report), 2 blocks the operation entirely.
Why Hooks Beat Prompts for Critical Automation
Claude’s instruction-following quality degrades as context grows. An instruction to “always run prettier after editing a JavaScript file” may be followed 95% of the time — which means it is missed roughly 1 in 20 edits. A PostToolUse hook fires 100% of the time, on every matching file write, with no reliance on Claude’s attention span.
Use hooks for: formatting, linting, blocking rm -rf variants, enforcing .env read denials, automated test execution, and anything where inconsistency has a real cost. The allowManagedHooksOnly enterprise setting prevents developers from adding their own hooks, ensuring only IT-approved hooks run across the organisation.
Subagents and Slash Commands
Subagents are specialised AI assistants that Claude Code can spawn to handle specific tasks. They prevent context bloat by giving complex sub-tasks their own isolated context window, then returning only the summary to the main session.
Subagent File Format
Subagents are stored as markdown files with YAML frontmatter:
---
name: code-reviewer
description: Reviews code changes for security issues and style violations
tools: [Read, Bash]
---

You are a focused code reviewer. Examine the provided diff and report...
User subagents live in ~/.claude/agents/ and are available in all projects. Project subagents live in .claude/agents/ and are shared with the team via git.
Preventing Context Bloat
When Claude explores a large codebase, tool call outputs accumulate in the context window quickly. Spawning a subagent for exploration tasks — mapping directory structures, searching for patterns, reading unfamiliar files — keeps that accumulation isolated. The main session receives a clean summary, not thousands of tokens of raw file content.
The three built-in subagent types are Explore (for codebase discovery), Plan (for architectural reasoning before action), and Verify (for checking that changes achieved the intended result). These can be controlled in permissions using Task(AgentName) syntax — for example, Task(Explore) in a deny rule prevents Claude from spawning the Explore subagent without approval.
Custom Slash Commands
Custom slash commands live in .claude/commands/ as markdown files. The filename becomes the command. A file named deploy-check.md becomes /deploy-check inside any Claude session in that project. These commands are a clean way to package common multi-step workflows — running a deployment checklist, generating a structured commit message, or triggering a specific audit — so that any developer on the team can invoke them consistently.
The 1 Hour Guide framework for AI workflow design covers how to structure slash commands as reusable business process templates, which is particularly relevant for teams that use Claude Code across multiple operational areas.
The ~/.claude.json State File
This file is the most important file in your Claude Code setup and the most dangerous one to mishandle.
~/.claude.json lives in your home directory — not inside ~/.claude/. It stores your OAuth session tokens (or API key association), per-project tool approval history (which tools you have already approved for which projects), user-scoped MCP server configurations, and various caches and session state.
This file must never be committed to git. It contains authentication credentials. If it enters version control, you are exposing your Anthropic session to anyone with access to that repository.
This file cannot be shared across machines. The OAuth session it contains is machine-specific. Copying it to a second machine does not transfer your session — it corrupts both. Each machine must authenticate independently using claude login or by setting the ANTHROPIC_API_KEY environment variable. The tool approval history stored inside it is also machine-specific: approvals you have granted on your Mac Mini do not carry over to your MacBook, which means you will be re-prompted for approvals on the second machine until it builds its own history.
Claude Code automatically creates timestamped backups of this file and retains the five most recent versions. If the file becomes corrupted, the backup directory (typically ~/.claude.json.bak.*) is the recovery path.
Token Efficiency: File-Level Optimisation
Every file Claude Code loads at session start consumes tokens before you type a single message. The following changes are ranked by impact:
1. Trim CLAUDE.md below 200 lines
- File:
~/.claude/CLAUDE.mdand./CLAUDE.md - Change: Audit every line. Remove anything that is a one-time instruction, only relevant to part of the codebase, or a multi-step procedure (move procedures to
.claude/rules/path-scoped files). - Token impact: High — CLAUDE.md loads into every session in full
- Trade-off: Reduced context; compensate with path-scoped rules
2. Move path-specific rules to .claude/rules/
- File: Create
.claude/rules/api-standards.md,.claude/rules/frontend.md, etc. - Change: Extract instructions that only apply to specific directories and add a path pattern to each rules file
- Token impact: High — rules only load when Claude works with matching files
- Trade-off: Requires discipline to maintain; rules not in root CLAUDE.md may be missed for general tasks
3. Disable auto-memory for shared or temporary projects
- File:
.claude/settings.json - Change: Set
"autoMemoryEnabled": falseor useCLAUDE_CODE_DISABLE_AUTO_MEMORY=1 - Token impact: Medium — auto-memory notes load at session start
- Trade-off: Claude does not accumulate project knowledge between sessions
4. Disable Tool Search if MCP server count is small
- File:
~/.claude/settings.jsonor environment variable - Change: Add
"toolSearchEnabled": falseto settings - Token impact: Medium — removes the tool search overhead and latency
- Trade-off: All MCP tools preload; large MCP configurations will consume more context upfront
5. Disable the 1M context window
- File: Environment variable
- Change: Set
CLAUDE_CODE_DISABLE_1M_CONTEXT=true - Token impact: Medium — limits context window to standard size
- Trade-off: Cannot process very large codebases in a single session
6. Reduce configured MCP server count
- File:
~/.claude.jsonand.mcp.json - Change: Remove MCP servers you are not actively using
- Token impact: Low to Medium — depends on how many servers are configured
- Trade-off: Lose access to those integrations until re-added
7. Use claudeMdExcludes for irrelevant directories
- File:
~/.claude/settings.json - Change: Add patterns matching directories where project CLAUDE.md files are irrelevant
- Token impact: Low — prevents unnecessary instruction files from loading
- Trade-off: May accidentally exclude useful context if patterns are too broad
For a systematic approach to token budgeting across AI tools, Twinlabs has published research on context window economics that applies directly to Claude Code configuration decisions.
Multi-Machine Setup via iCloud
For a Mac Mini and MacBook sharing an Obsidian vault via iCloud Drive, the following table defines exactly what to sync, symlink, or keep machine-local:
| File / Directory | Sync via iCloud? | Symlink? | Machine-local? | Why |
|---|---|---|---|---|
~/.claude/CLAUDE.md | Yes | Yes — symlink to iCloud copy | No | Personal instructions should be identical across machines |
~/.claude/settings.json | Yes | Yes — symlink to iCloud copy | No | Global permissions should be consistent |
~/.claude.json | No | No | Yes | Contains machine-specific OAuth session and approval history |
~/.claude/agents/ | Yes | Yes — symlink directory | No | Personal subagents should be available on both machines |
project/.claude/ | Via git | No | No | Commit to git; pull on second machine |
project/.mcp.json | Via git | No | No | Commit to git; pull on second machine |
.claude/settings.local.json | No | No | Yes | Machine-specific overrides; gitignored by design |
~/.claude/memory/ | No | No | Yes | Auto-memory is machine-local; syncing causes conflicts |
CLAUDE_CODE_DISABLE_AUTO_MEMORY | No | No | Yes | Shell profile variable; set independently per machine |
Symlink Commands (Run on Second Machine)
First, ensure your iCloud Drive path contains the shared Claude config. On the Mac Mini, copy the files to iCloud first:
# On Mac Mini — copy to iCloud
mkdir -p ~/Library/Mobile\ Documents/com~apple~CloudDocs/claude-config
cp ~/.claude/CLAUDE.md ~/Library/Mobile\ Documents/com~apple~CloudDocs/claude-config/
cp ~/.claude/settings.json ~/Library/Mobile\ Documents/com~apple~CloudDocs/claude-config/
cp -r ~/.claude/agents ~/Library/Mobile\ Documents/com~apple~CloudDocs/claude-config/
Then on the MacBook — create symlinks back to iCloud:
# On MacBook — create symlinks
ICLOUD="$HOME/Library/Mobile Documents/com~apple~CloudDocs/claude-config"

# Back up existing files first
mv ~/.claude/CLAUDE.md ~/.claude/CLAUDE.md.bak
mv ~/.claude/settings.json ~/.claude/settings.json.bak
mv ~/.claude/agents ~/.claude/agents.bak

# Create symlinks
ln -s "$ICLOUD/CLAUDE.md" ~/.claude/CLAUDE.md
ln -s "$ICLOUD/settings.json" ~/.claude/settings.json
ln -s "$ICLOUD/agents" ~/.claude/agents
After creating the symlinks, authenticate Claude Code independently on the MacBook:
claude login
# or
export ANTHROPIC_API_KEY="your-key-here"
The authentication step is machine-specific and cannot be shared. Every other configuration will be identical across both machines once the symlinks are established.
For a practical guide to setting up multi-machine AI development environments on a budget, AI Coach covers this topic with specific guidance for South African operators running Mac-based workflows.
The Bottom Line
Claude Code is not a black box. It is a system of files, each with a defined scope, load order, and effect on session behaviour. CLAUDE.md carries your context. settings.json enforces your permissions. Hooks guarantee your automation. ~/.claude.json holds your identity. Understanding which file does which job — and keeping each file focused on that job alone — is what separates a Claude Code setup that feels unpredictable from one that behaves exactly as configured.
The investment in this architecture pays off in three ways: lower token costs per session, more consistent Claude behaviour, and a setup that transfers cleanly across machines and teammates without manual re-explanation every time.